
In This Article:
When setting up IVR to run a report on IVR a Queue needs to be set up that points IVR to a Queue, rather than the IVR itself.
Process:
To use Reporting to track IVR usage, follow the steps below:
1.) From the Admin Account Dashboard, click the Account main menu.
2.) Click the Call Center Queues menu option.

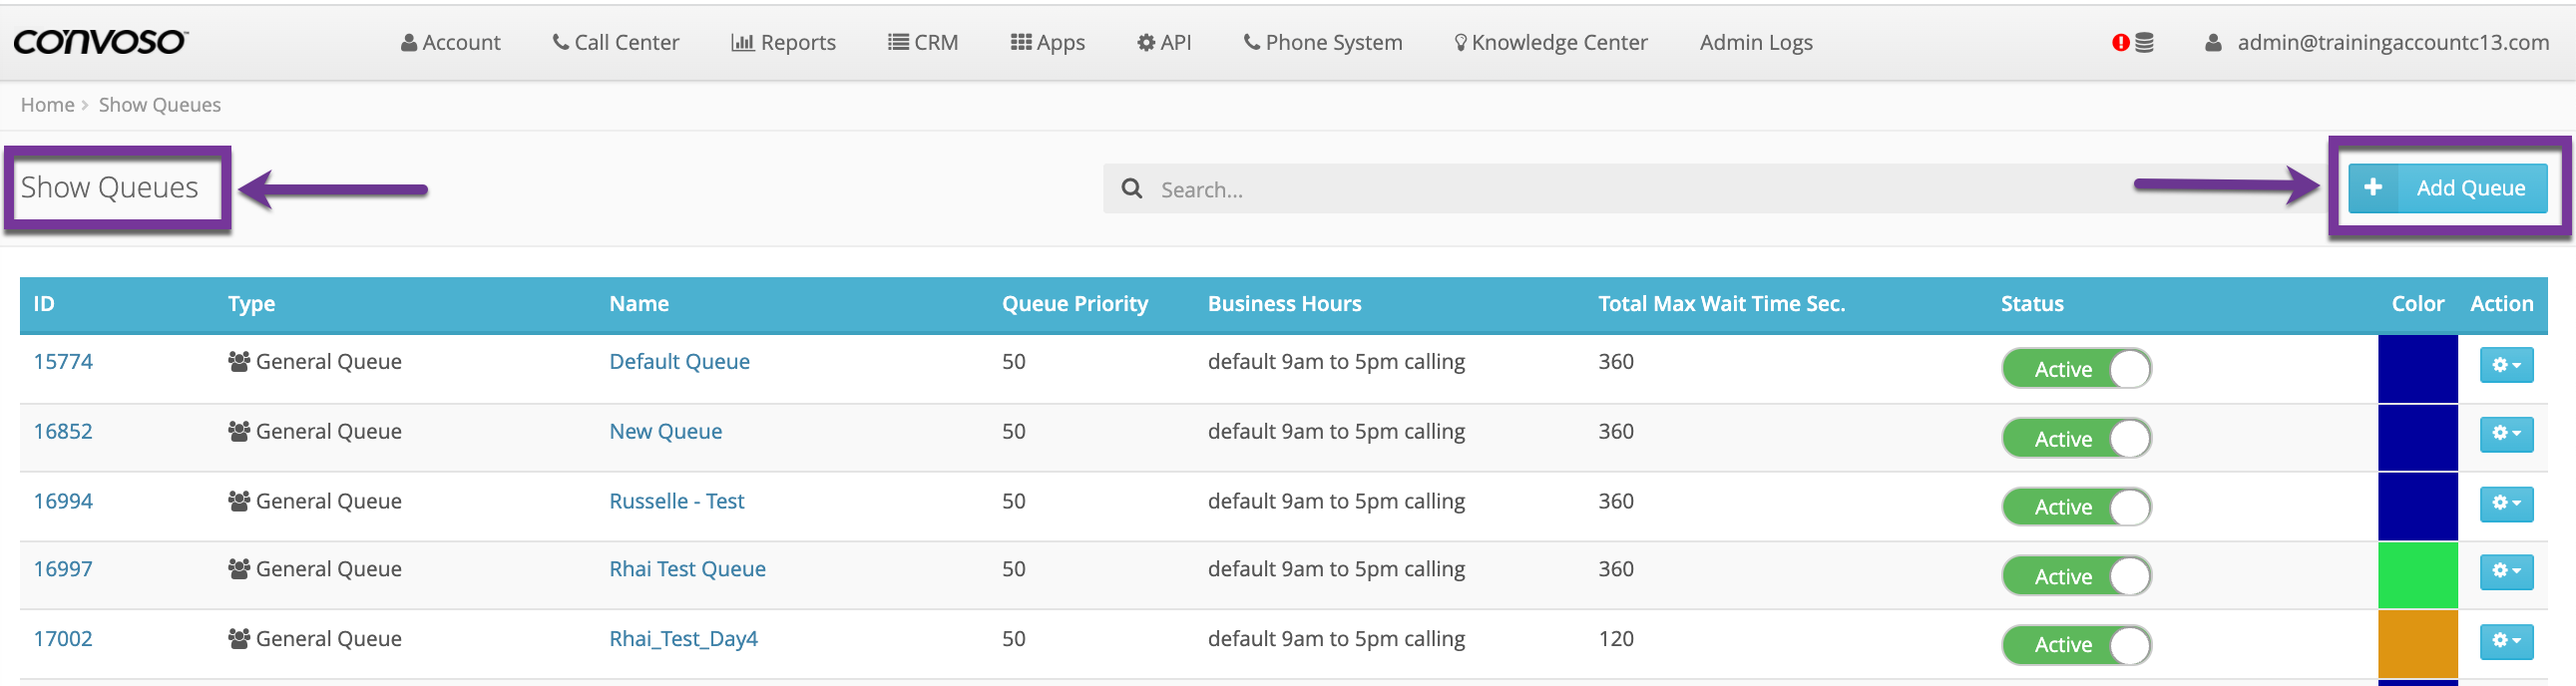
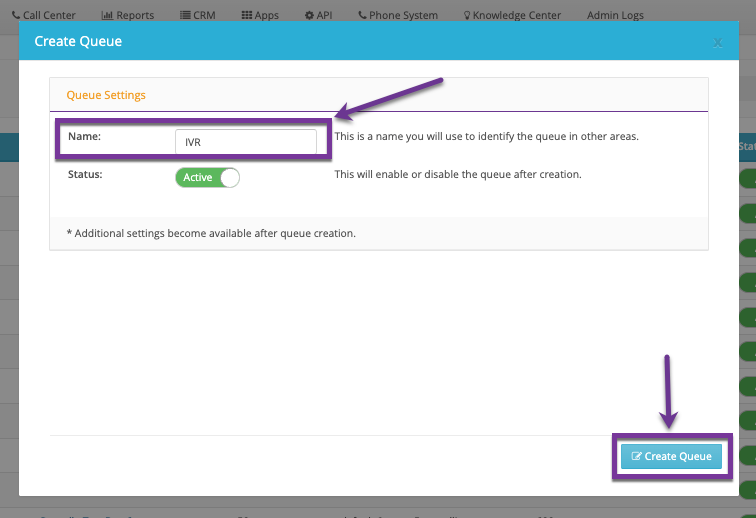
4.) Create a Queue called IVR, enter a name in the name field of the Create Queue window.
5.) Click the Create Queue button.
For Example: If you are going to have a Support press # option (press 1, press 2…) create a Queue called Support Queue. In the IVR settings, route the Support press # option to Call Center Queue>Support Queue and add the Support Agents to that Queue.
6.) In the IVR Queue Settings page, click the Call Routing tab.

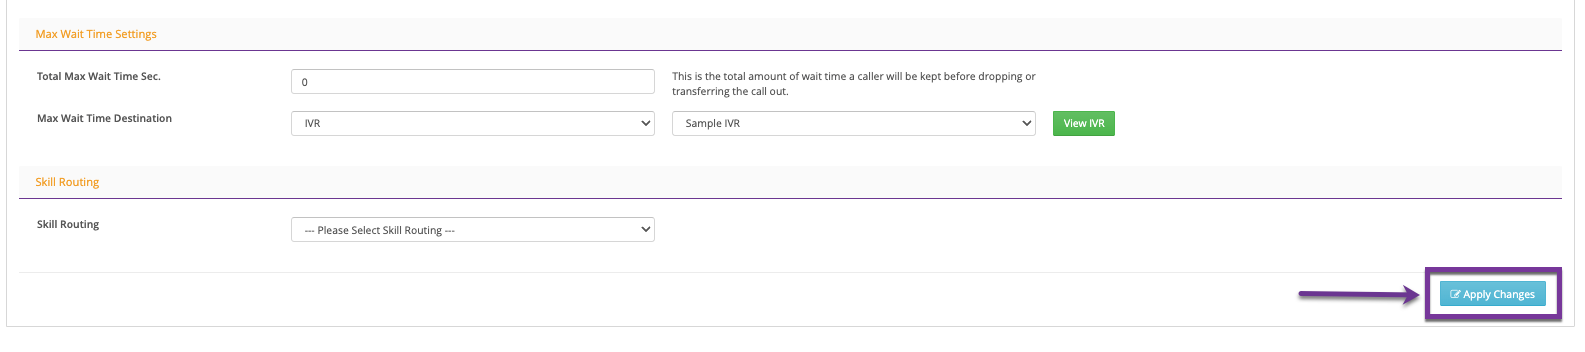
7.) Scroll down to Max Wait Time Settings section.

8.) In the Total Max Wait Time Sec. field, enter a 0(zero) value.
9.) In the first Max Wait Time Destination field, select the IVR option from the drop-down menu.
10.) In the second Max Wait Time Destination field, select the name of your newly created IVR from the drop-down menu.
Note: When re-routing your phone numbers to the IVR, do not link it to the IVR itself, link it to the IVR Queue that you have created.
11.) Click the blue Apply Changes button in the bottom-right of the page.
After the IVR Queue is configured, the Inbound Numbers need to be directed to the IVR Queue.
12.) Click the Account main menu.
13.) Click the Inbound Numbers menu option.
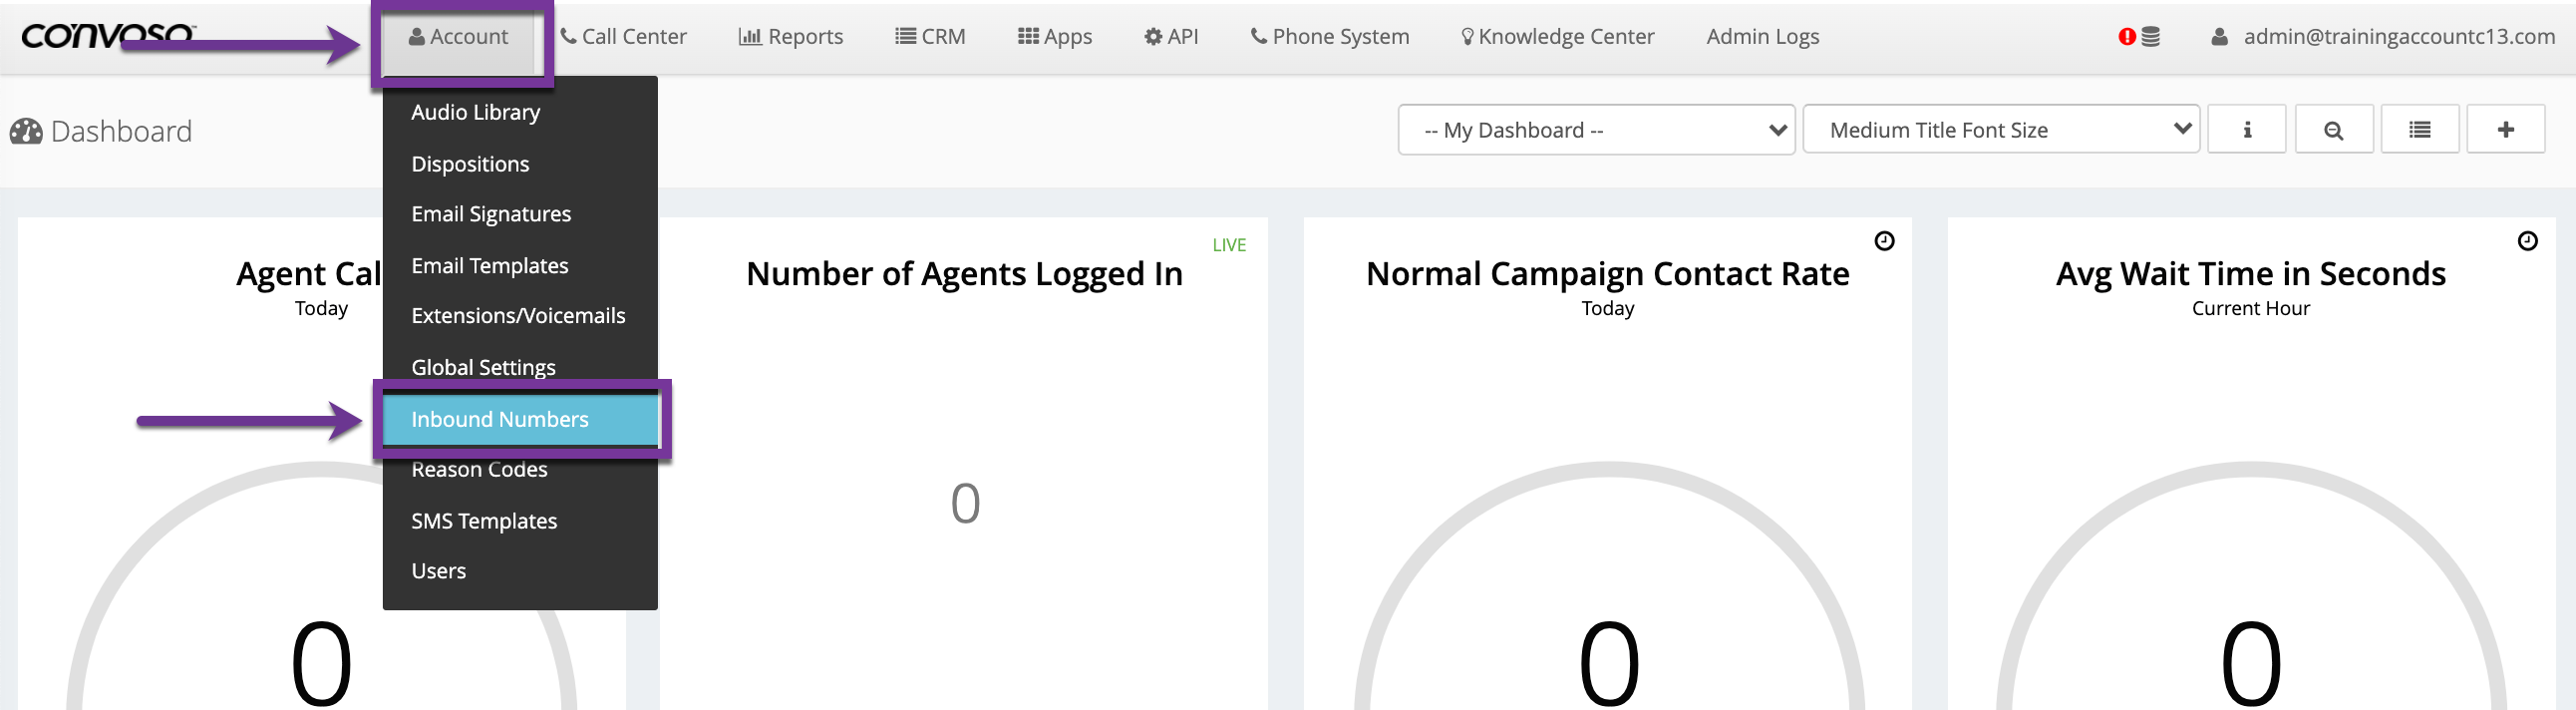
The Manage DIDs page will open.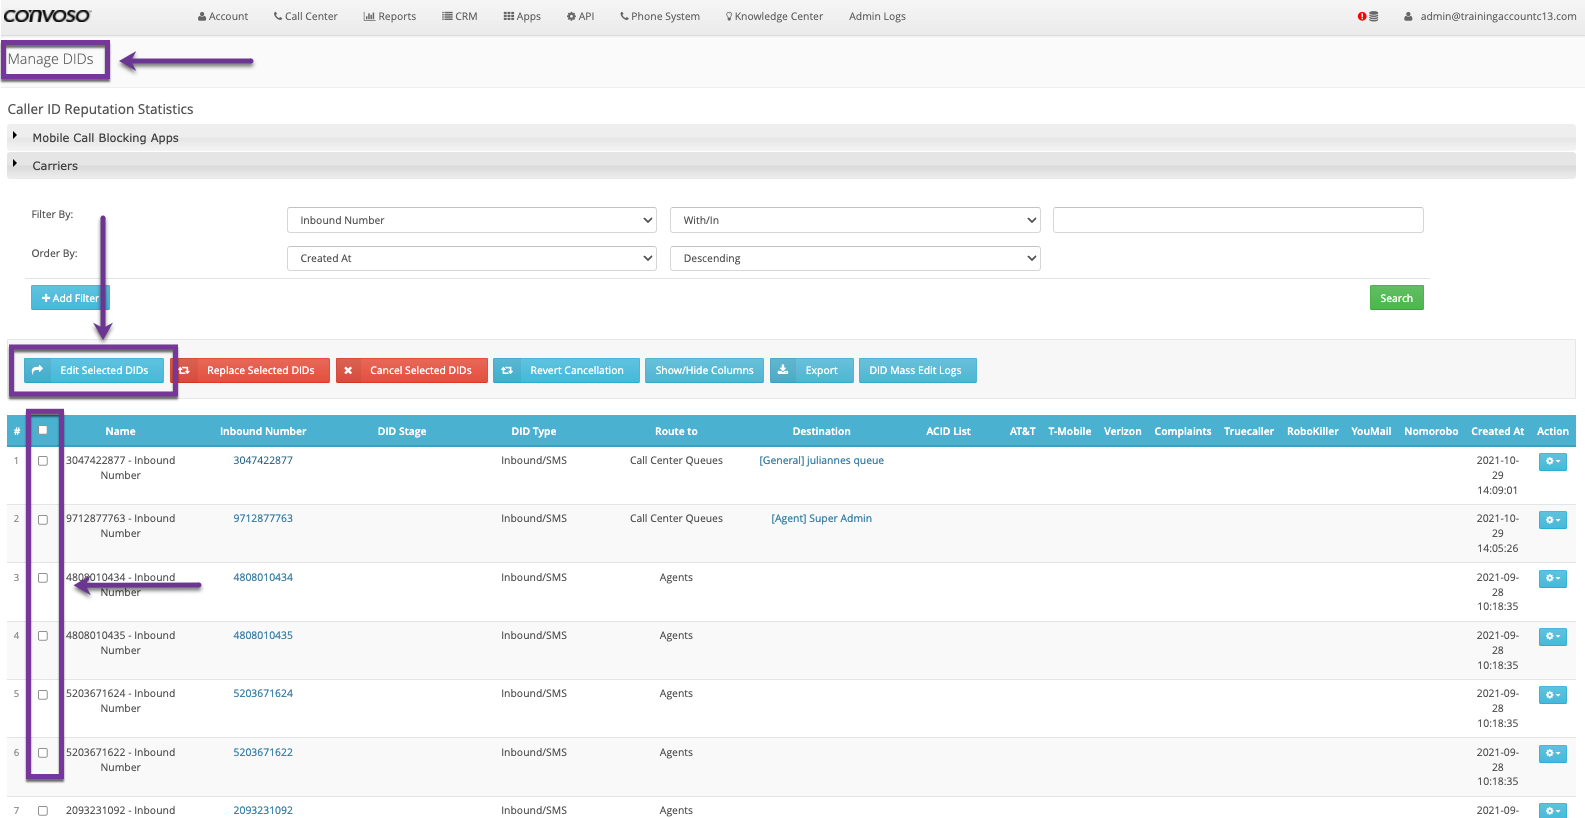
14.) Select the number(s) you would like to direct to the IVR, there are multiple ways to do this:
-
By Clicking the checkboxes in the Checkbox column to the left of the numbers, to select specific numbers.
-
By Clicking the checkbox at the top of the Checkbox column to select all the numbers being viewed on that page.
-
When selecting numbers using the checkboxes, click the blue Edit Selected DIDs button above the Checkbox column.
-
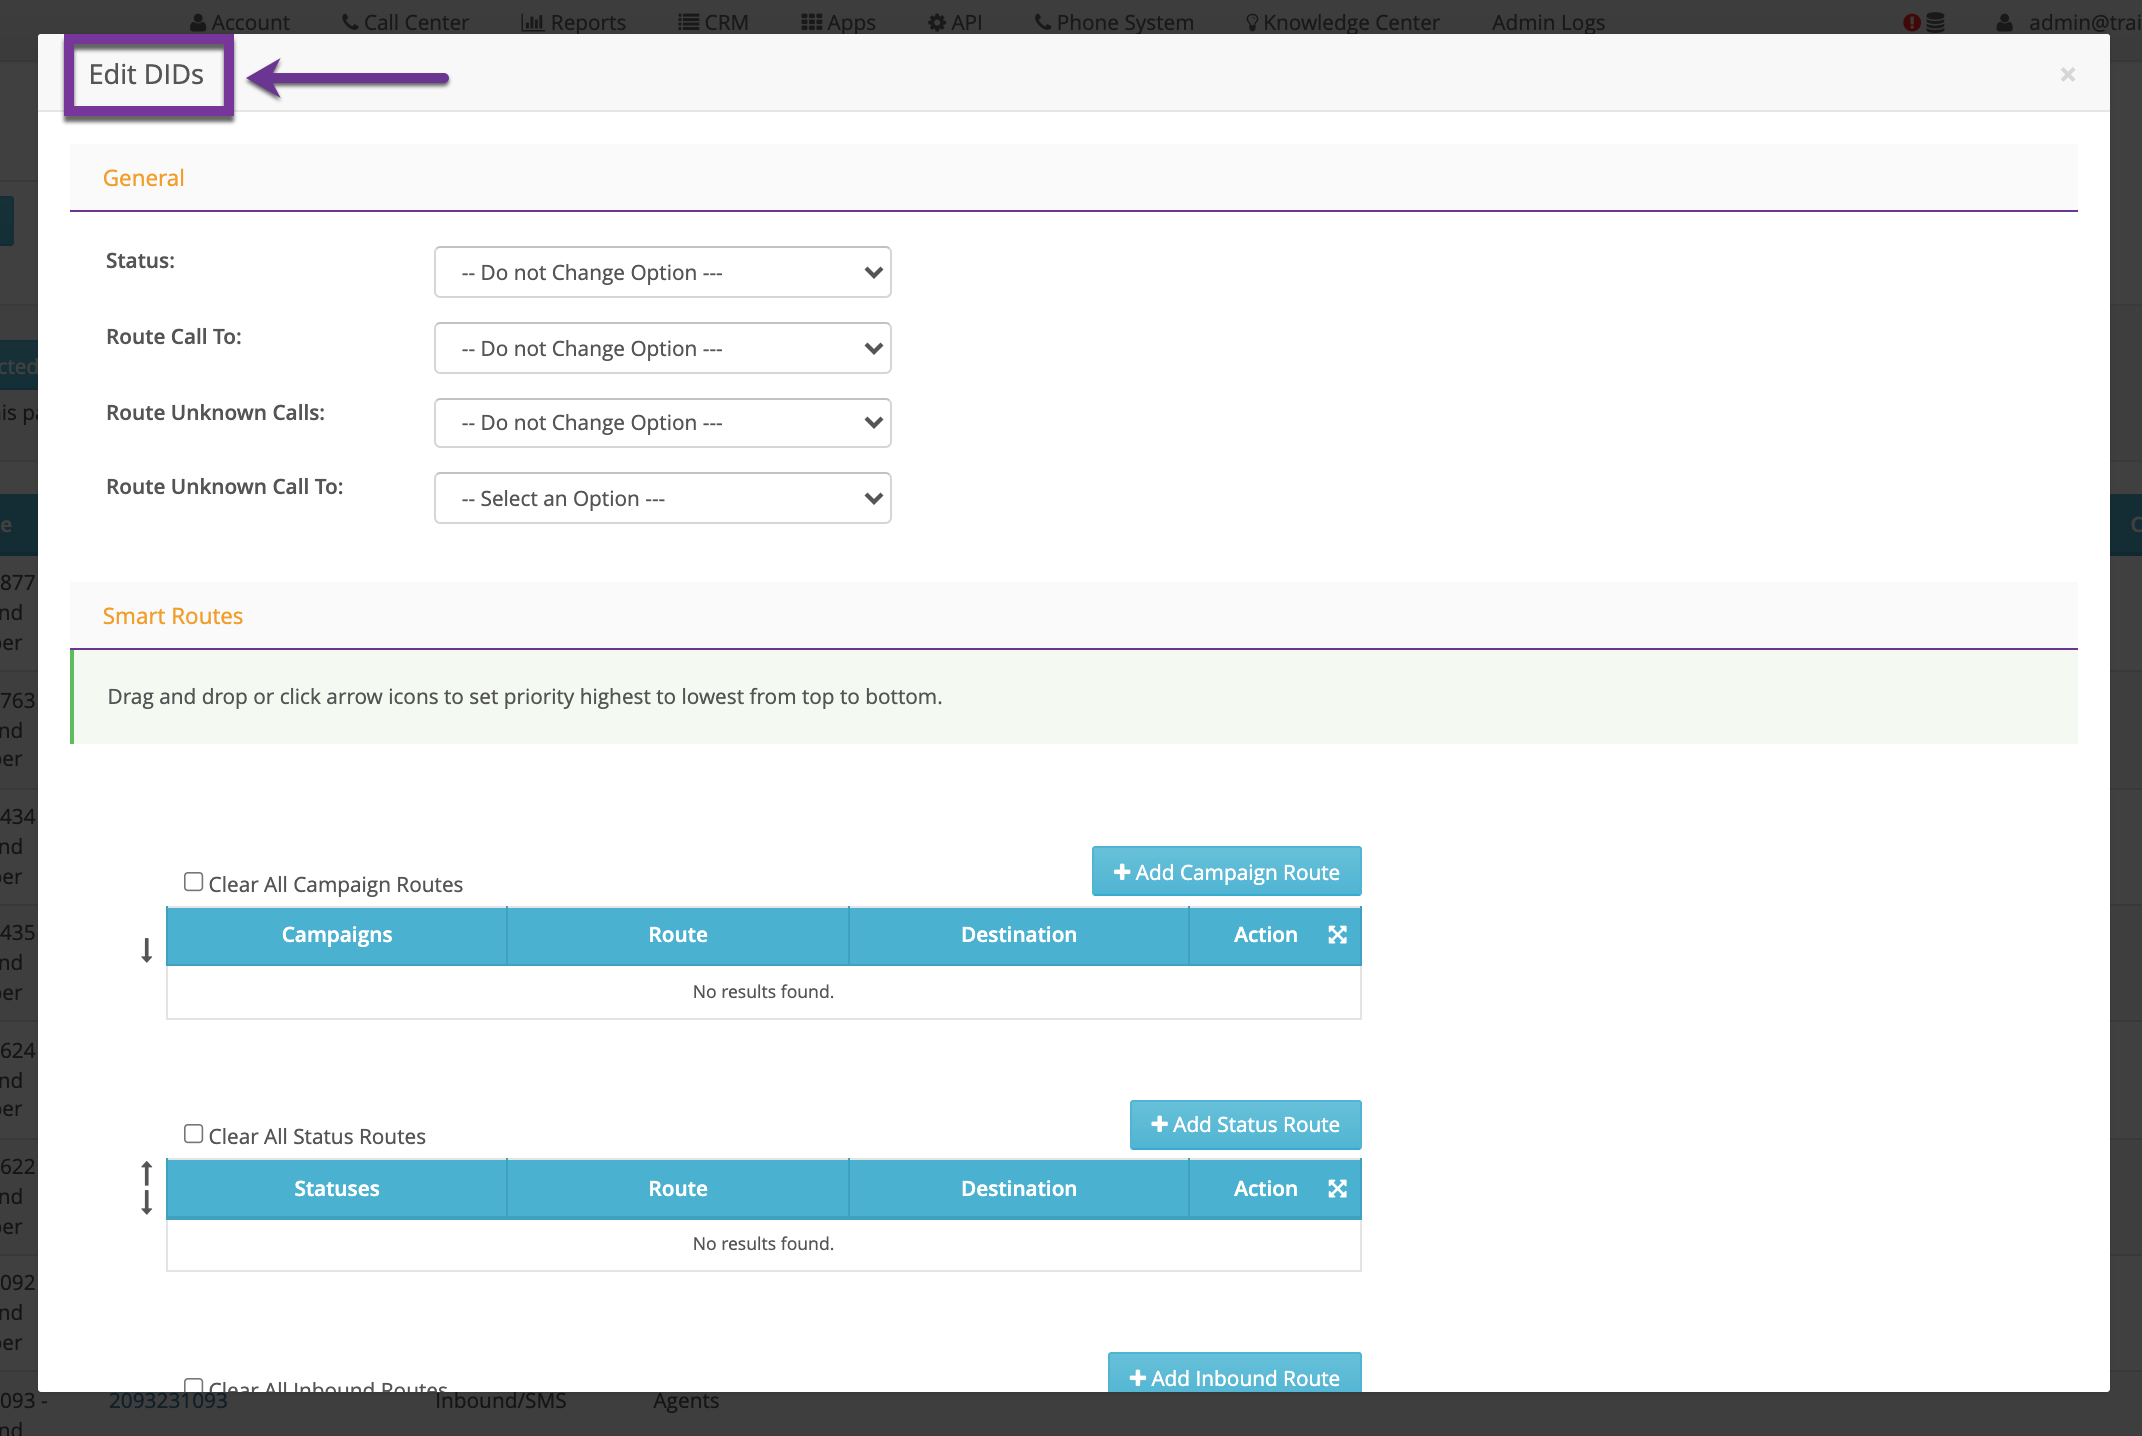
The Edit DIDs window will open.
-
Or by clicking on a single number in the Inbound Number column.
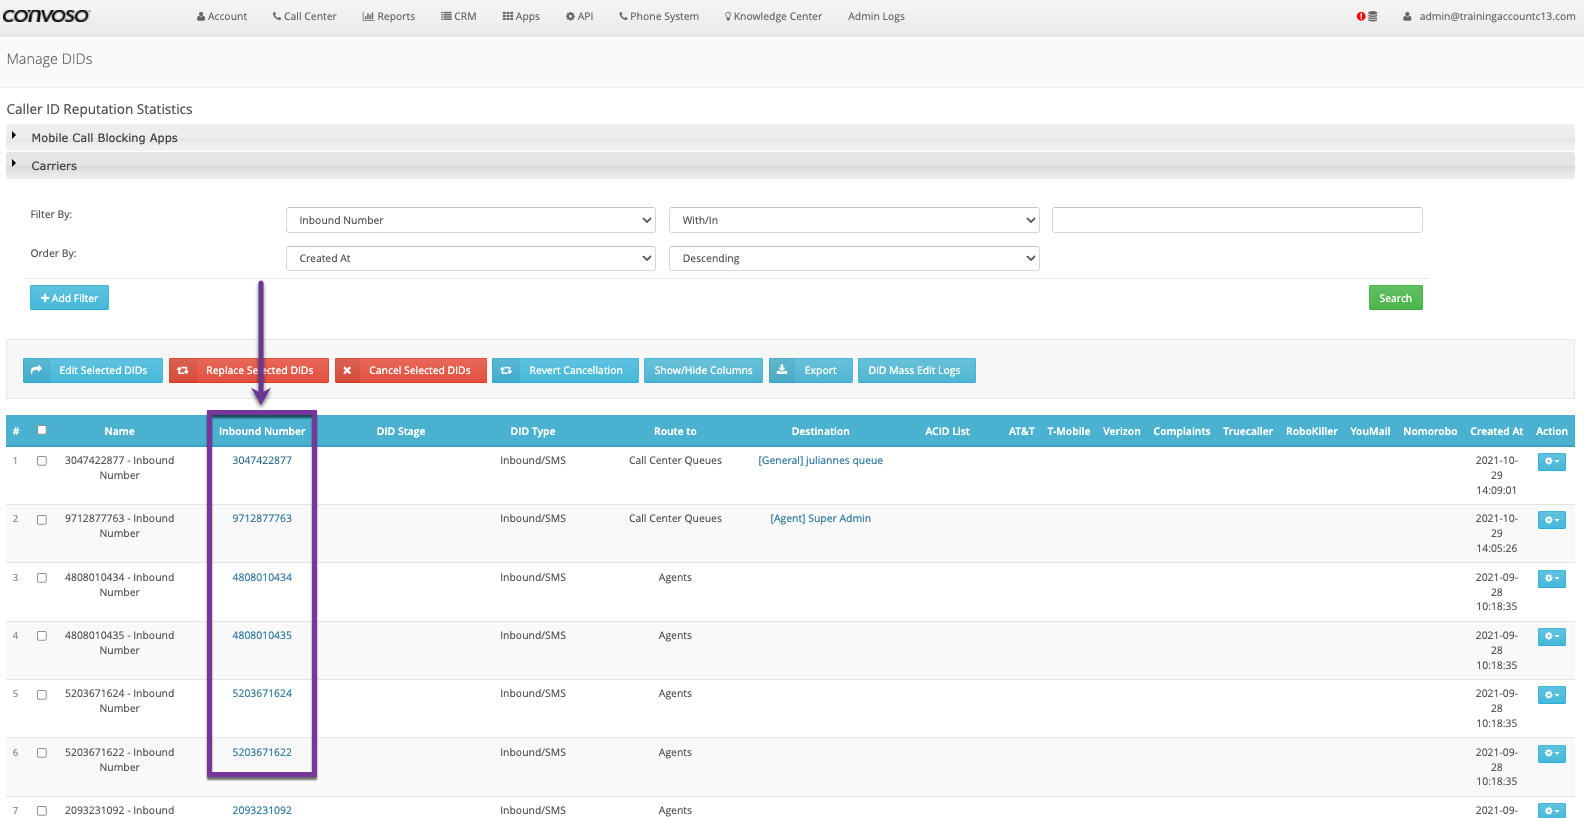
When selecting a single number, the Inbound Number page will open.
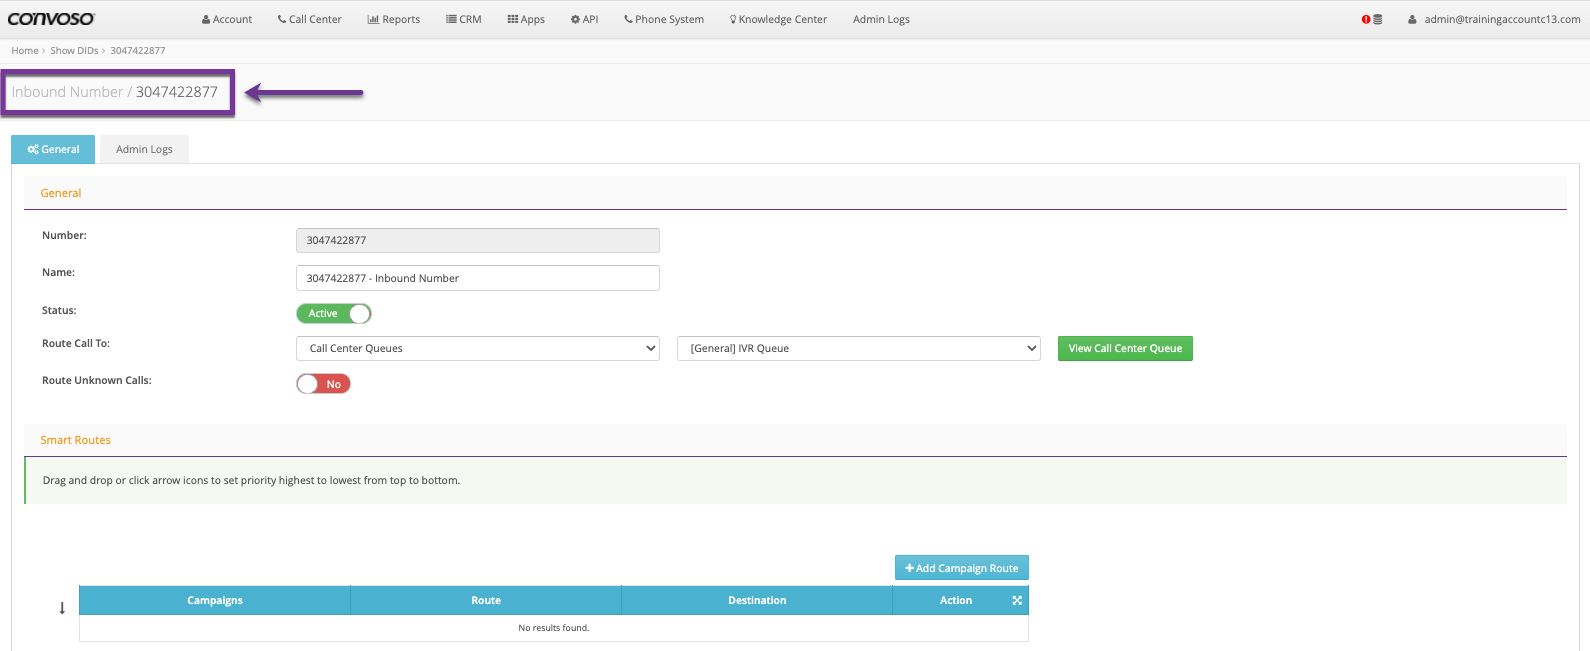
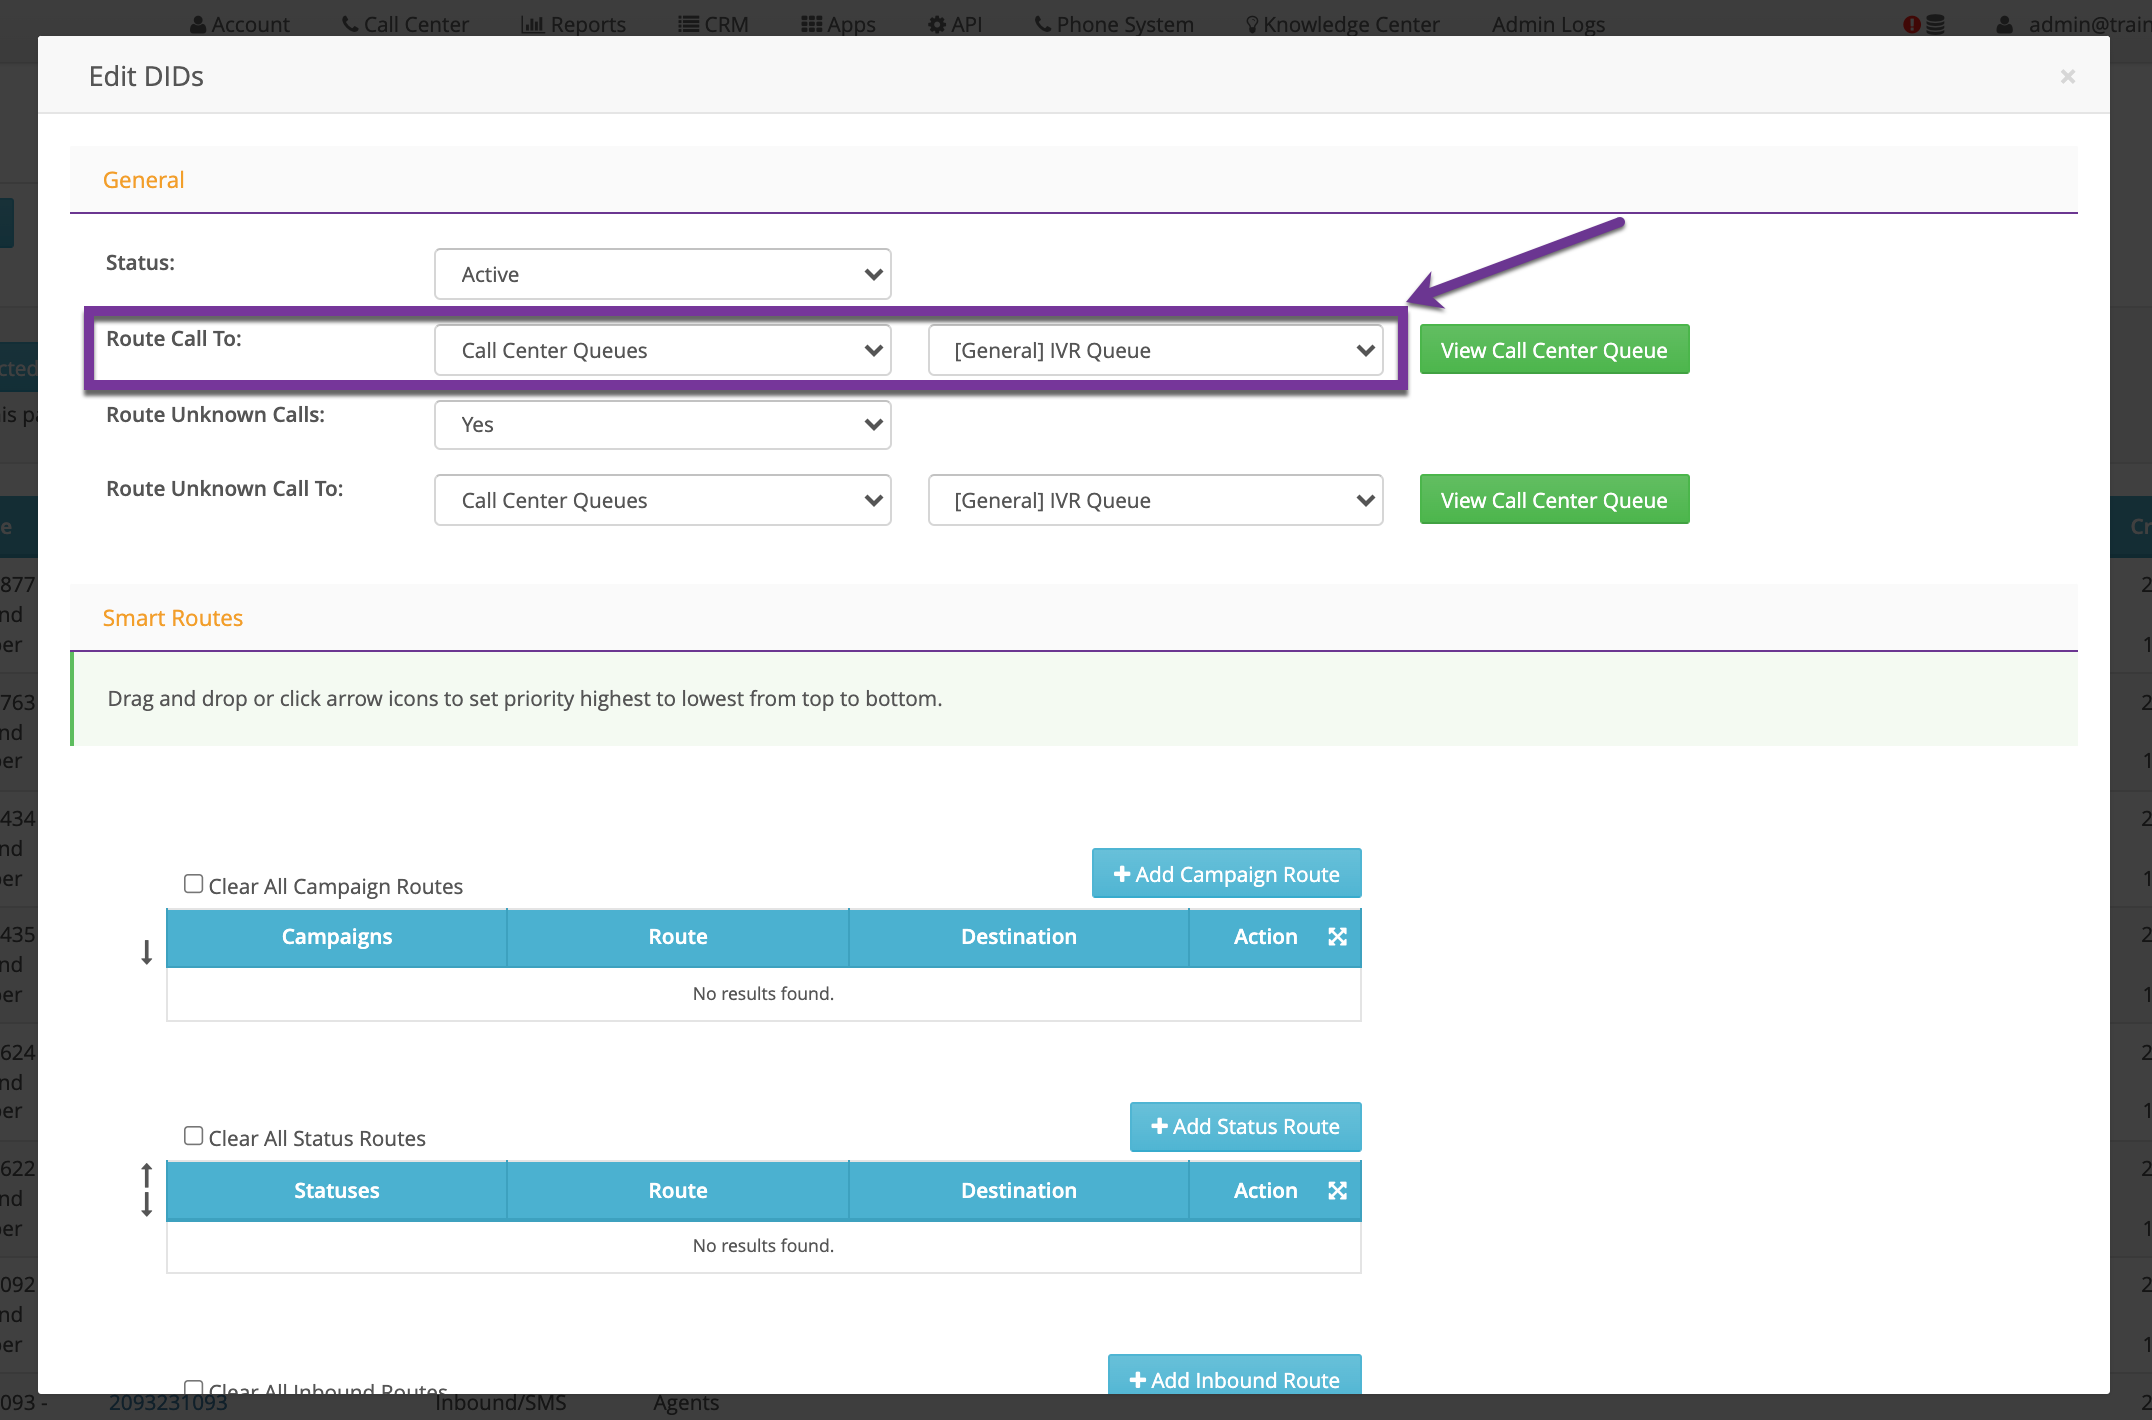
In both the Inbound Number page when editing a single number and the Edit DIDs window when editing multiple numbers, you will see the same the Route Call To fields in the General section.

15.) In the first Route Call To field drop-down, select the Call Center Queues option.
16.) In the second Route Call To field drop-down, select the IVR Queue you created.
17.) After setting the Route Call To fields, scroll to the bottom of the Edit DIDs window or the Inbound Number page, (whichever is being used.)
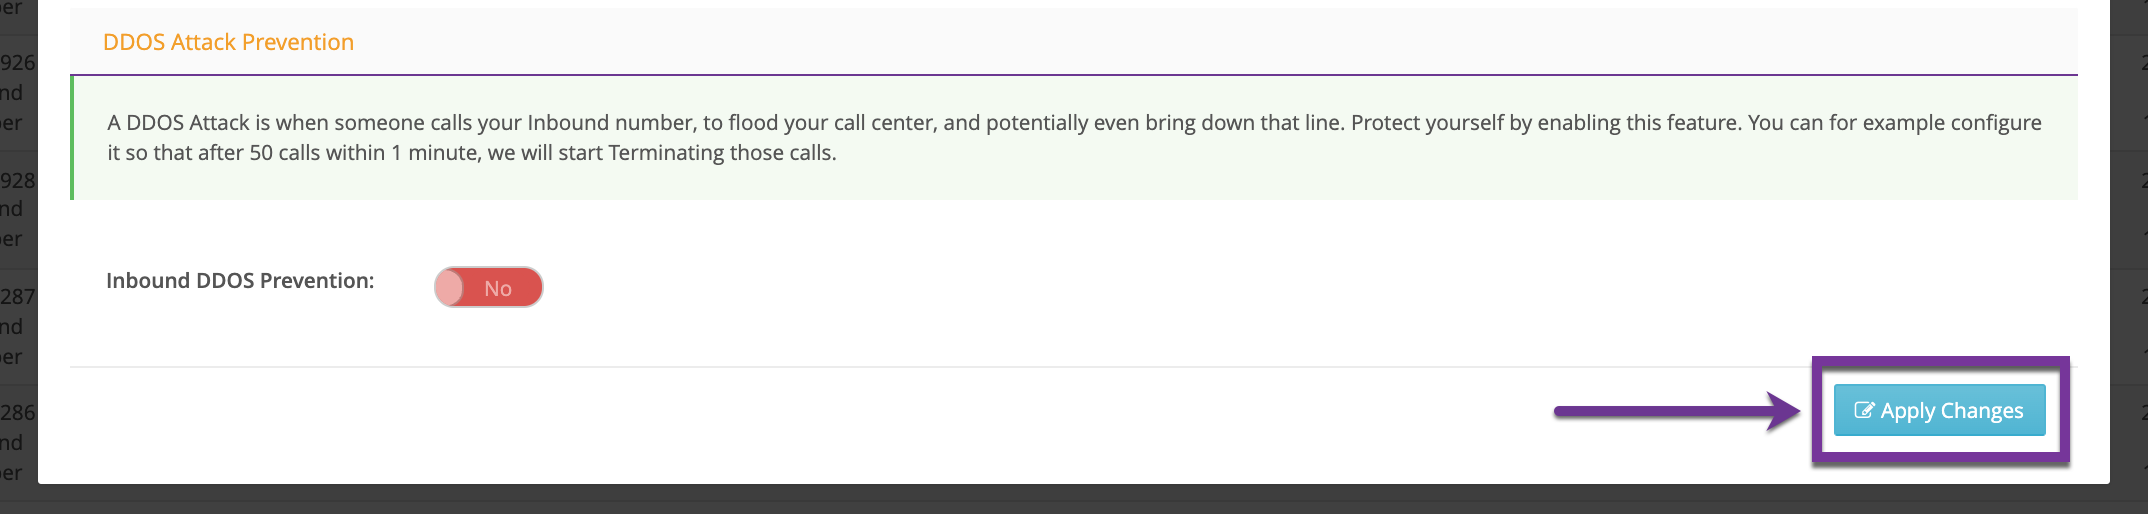
18.) Click the blue Apply Changes button (the bottom of both look the same.)